Friday, 29 April 2016

How to Stitch a Long Frock

     How to Stitch a  Long Frock 

How to Stitch a Long Frock: An Introduction


In this Hub, I'll explain how I stitched a long frock for my daughter Anna. This frock has many flairs, and is also very easy to make.
I often create new patterns of frocks for Anna. I'll start by researching on the Internet, start with a pattern in mind, but then will often end up with something completely different. This one turned out beautifully -- impressing friends and family members. I'll now share with you below in this article.

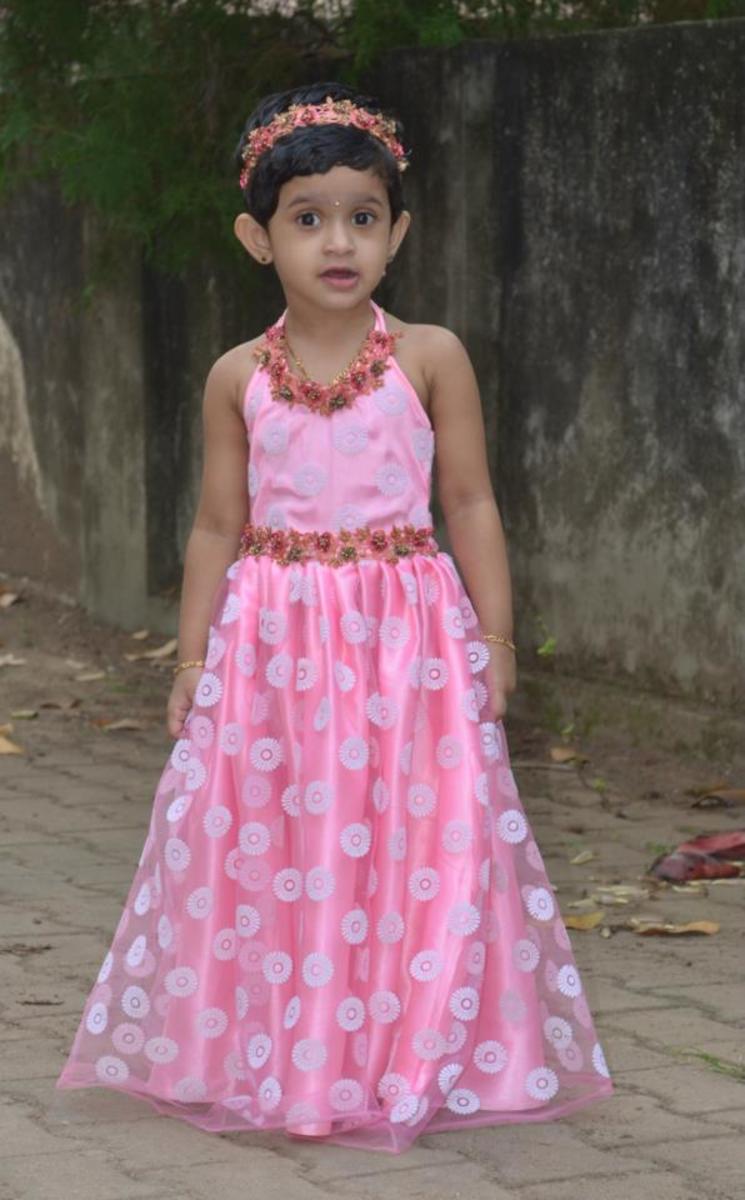
Anna in her Long Frock


Anna in her long frock.

Materials Needed

Anna, who was three at that time, didn't require much for her long frock. I bought:
  • Pink net material with a white print -- 3.5 meters
  • Pink satin material for the lining -- 1.5 meters
  • Dark pink lace to decorate the frock and also to create the headband -- 1 meter
There was not a piece of material wasted, once the frock was completed.

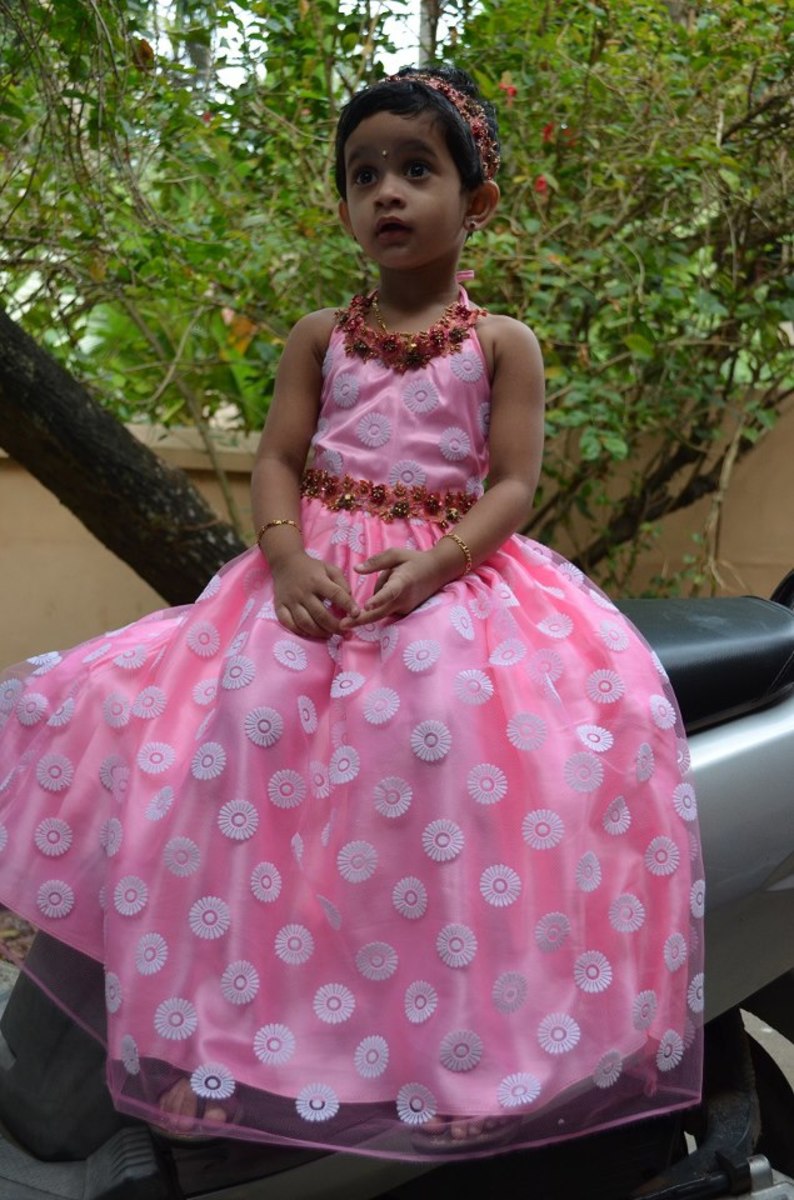
More Shots of Anna in Her Long Frock


Anna in her long frock

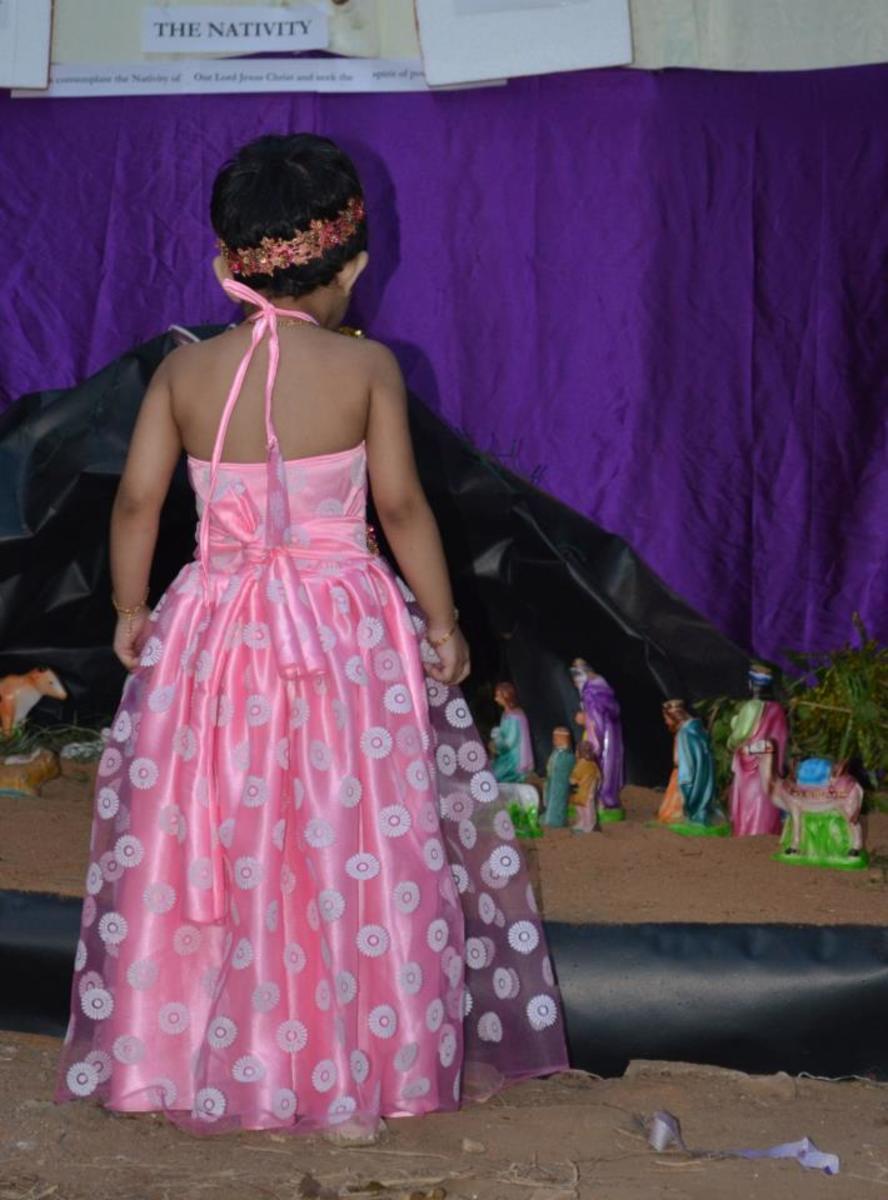
Anna in her long frock (back portion)

Cutting the Pattern

For a hopefully better idea of how the pattern should be cut, please see the image sketches below. Please note however that these are not technical or professional explanations, just my personal ones.
For measuring, it is better to first use an already correctly fitted frock of your child.
  1. Place it along the net material, which should be folded into four as we do it for Churidars. Note: Be sure that you take a portion towards the end of the whole net material, so that there will be no waste.
  2. Now, cut the top portion and split the front and back ends. Cut the back portion along the middle so that it will be open on the back of the frock.
  3. Then, take just enough cloth for tying the frock and make an equal portion of the rest of the material to stitch the bottom portion.
  4. For the top, do take same measurement of lining material and leave the rest for the bottom. Also, make sure you cut enough cloth for tying the top to the neck.
  5. Stitching the Frock

    • Top: Join the lining with the front net material, with the good side of the net cloth inside. Then, revert the same. Likewise, do this for back portion also.
    • Bottom: Now, stitch the bottom portion along with the lining to the top portion -- this is for both the front and back side. Stitch the cloth to tie the frock separately and join to the top, front portion and then stitch together the front and back portion.
    • Neck: Then, stitch the cloth to tie the frock to the neck. Note: To create a special look, stitch the lace towards the neck and also to the waist of the frock. With rest of the lace, a head band also can be created.
    Hope this Hub was informative -- do contact me if you have any further doubts or comments.

How to make a pair of culottes

   How to make a pair of culottes


In our last post, where we hacked the Elisalex Dress into a floaty boho dream of a dress complete with neckline capelet, we touched upon the subject of trends, and how I'm - generally speaking - rarely one for basing my season's sewing plans on the latest issue of Vogue. Don't get me wrong - I love looking at the pretty pictures, and I take a wealth of inspiration from a small handful of designers season in and season out, but when it comes to things like "five must-have looks for fall", I'm never usually sold. Until this season, apparently! 70s boho? Digging it. Debutante chic? Always. Velvet?Bring it on. And it's not just me - Victorian goth? Hello, Victoire! High-necked geek glam?Ummm, Charlotte!
So now that Autumn Winter 2015 has 100% infiltrated our sewing plans, we thought we may as well start a little series to document it, with some fun pattern hacks and DIY tutorials thrown in for good measure. First up, culottes.
Aaaaahhhh, culottes. When I used to picture (ok, wear) culottes, they were nothing more than floral mock-skirts that didn't fall quite as well or look quite as good as a skirt, because they weren't a skirt. They were, in fact, the boring sensible cousin of the skirt. Just look at how far the culotte has come... Not pretending to be anything it's not, instead unashamedly basking in its own softly tailored, wide-legged, ankle-grazing glory. Here's a little Pinterest candy that gets my point across nicely.

Step 1 - Altering the pattern

Now, you could quite easily just hack 15" off the length of the existing Holly trousers and call it a day, but in order to really make the most out of this season's culottes trend, we wanted to throw in some menswear inspired details, namely pleats and slanted pockets (because you always look chicer when you have a pocket to lean into). 
To draft the pleats, and at the same time increase the width of the trouser legs, draw a vertical line from the waistline notch to the hem for the trouser front, and through the centre of the dart to the hem for the trouser back.


Cut these vertical lines. 


Place your spare pattern paper underneath and open up that vertical cut by 2" evenly all the way down, for both front and back pieces. Tape down to secure and re-draw the waistline. 


For the trouser front, you'll want to mark three notches along the waistline to indicate the pleat - one either side of the 2" opening, and one slap bang in the centre (new notches shown in red). To create the box pleat we'll be bring the outer notches in to meet the central notch.


For the trouser back piece, the outer notches are the same notches as indicated by the dart we split in half, and the central notch is the halfway point between them.
Finally, slice off the bottom of the trouser legs to achieve your desired length of culotte. I opted for a final length of 28" waistline to hem. Don't forget your hemming allowance!


If you're adding side slanted pockets to your culottes, check out this post here.
Cut out your fabric and let's get sewing!

Step 2 - Assembling the culottes

First things first, get your pockets all sewn in to your trouser fronts (as outlined in our tutorial linked to above).
Assemble the inverted box pleats on all front and back trouser pieces by bringing the outermost notches in to meet the central notch. Pin into place and baste to secure.


Now go about the rest of the sewing of your Holly trousers as normal. Do check out our Holly Jumpsuit Sewalong for any guidance with sewing or altering the Holly trouser pattern.

I moved the zipper from the side seam to the centre back so that it wouldn't interfere with the pockets. If you choose to do the same, the only thing different in the order of the steps in assembling your trousers, is that you'll be sewing both side seams, followed by both inseams, then inserting the zipper at centre back, and finally sewing the crotch seam.

And there you have it! Made up in a soft and bouncy wool crêpe, I couldn't have been more comfortable running around town in these today. Comfy, and chic as hell, and bang on trend you guys!


Ready Made Garment


               Ready Made Garment


Ready Made Garments are mass-produced finished textile products of the clothing industry. They are not custom tailored according to measurements, rather generalized according to anthropometric studies. They are made from many different fabrics and yarns. Their characteristics depend on the fibers used in their manufacture. Ready-made garments are divided into the following types: Outer clothing: workwear and uniform, leisure wear, sportswear (e.g. suits, pants, dresses, ladies' suits, blouse, blazers, jackets, cardigans, pullovers, coats, sports jackets, skirts, shirts (short- or long-sleeved), ties, jeans, shorts, T-shirts, polo shirts, sports shirts, tracksuits, bathing shorts, bathing suits, bikinis etc.) Underclothing (underwear): jersey goods, lingerie (e.g. underpants, undershirts, briefs, socks, stockings, pantyhose etc.)

History

The first Ready Made Garment factory was established in New York in 1831. During the American Civil War the need for ready made uniforms helped the garment sector grow in the United States.[3] Near the end of the nineteenth century there were changes in societal views towards Ready made garments. They were no longer seen as only for the lower classes but also for the middle classes. This trend started in the United States. In the beginning they were more popular with men than women.[4] In the late 1860s 25% percent of Garments produced in the US was Read Made but by 1890 the portion had risen to 60%. By 1951 90% percent of Garments sold in the United States was ready made. During the same time two-thirds of garments sold in France was ready made.

Making Your Own Clothes

               Making Your Own Clothes


bolts-2 


Twenty years ago most fabric stores carried a large variety of fashion fabrics  so that the home sewer could, without too much effort, make clothes for herself/himself and the family for less expense than buying the same ready made clothes from stores.  Since that time most fabric stores have converted themselves into craft stores that carry mostly printed cottons for quilting with much less stock in fashion fabrics.  Another big change is that the price of good fabrics has risen while super cheap ready made clothing discount stores have proliferated to the point where asking if making your own clothes is worth it is a damn good question.
I would like to point out that whether it is economically worth your while to sew your own clothes depends on quite a few factors.  It is possible to save money sewing your own, but these are the main factors which must be considered:
What do you spend on your clothes now?
What is your sewing skill level?
What fabric resources do you have available to you?
What do you spend on your clothes at ready-made stores? If you are buying designer clothes (and most people I know are not), whether at full price or discounted price, you will obviously be able to save a tremendous amount of money making your own.  Designer patterns are available to those with the sewing skill to use them.  Most of us, I’m willing to bet, buy our clothes from more mid-range companies from department stores (looking for sales), or we scour the racks at places like Ross hoping for $5 shirts that fit.  If you are buying from heavy discount stores you are the one most likely to be saying that there is no way that sewing your own clothes can save you money.
Pricing it out (the average cost of a home made shirt):
Most decent fabrics cost between $7 and $15 per yard.  The average shirt takes between 2 and 3 yards of fabric.  Working with averages we can estimate the cost of making your own shirt: 2.5 yards x $11.00 = $27.50.  You must also figure on thread.  An experienced sewer generally has enough thread that it doesn’t need to be included in the price of every project, but let’s say you need the thread.  That’s going to cost you between $3 and $5, depending on the brand and spool size.  So let’s just stick with averages: $27.50 + $4 = $31.50
A lot of shirts require buttons and not everyone has a huge collection of them on hand, so you must figure the buttons as well.  You’re likely to spend between $1 and $10 on buttons (depending on whether you go for the discount type of simple button or fashion buttons) so let’s say you’re going to spend an average of $5 on buttons.  That brings your average home sewn shirt up to $36.50.
However, unless you’ve been collecting patterns for years in all different sizes (or know how to make your own), you will need a pattern too!  Patterns vary widely in price from $1.99 to $30.  So let’s add that onto our average home sewn shirt cost: $36.50 + $16 = $52.50  Wow, that doesn’t seem like a bargain when most of the shirts you can find at Ross cost less than $20.  So why would you spend your time and resources sewing your own if you’re not saving anything, and might in fact, be spending more to make your own than to buy ready made?
Cost cannot be looked at solely from the dollar perspective. This is true for many things.  When you’re considering home economics you have to consider quality.  The reason why designer clothes are so expensive is not just to gouge label-loving losers (a common belief, not shared by me) but because the quality of the fabrics, the care and time taken to make the fit of the clothes exquisite, and the attention to details in construction which make a garment last for years longer than their cheaper counterparts all go into the cost of designer clothes.
If you haven’t ever tried on or touched a designer garment, you should do so just to understand the difference.  I have rarely bought designer clothes but I have tried them on and examined them closely.  Details such as bound button holes, linings, tighter stitching, and enclosed seams all contribute to a garment that you can pass down through generations if it’s taken care of.  You will not find such care in design and construction in any shirts that cost less than $50.  Either the fabrics are cheap and will pill up quickly (or tear), or the stitching is shoddy and comes undone with too much wear.
The home sewer has control over many of these factors through her/his skill level.  Using shorter stitch lengths, back-stitching, seam treatments, and fabric quality are all factors that you have control over.  You can also custom fit a garment at home if you take the time to take your measurements and adjust your pattern accordingly.  If you do fittings before you’re finished you can make the waistband fit properly which is not a service you get when shopping at J.C. Penny.  You can make a $52.50 shirt seem like a bargain if you make it something that will last like a designer investment.
Although I have used average prices to illustrate the cost factor here, there are many ways you can cut down on the cost of your home sewn clothes.  It depends on what resources you have available to you in your area, or what you can find on line.  Shopping for fabrics on line is not always wise when you are buying fashion fabrics unless you are buying from a familiar seller whose quality (in general) you have confidence in.
Here are some ways you can cut down on the cost of making your own clothes:
  • Use coupons: I am generally not a big fan of coupons but JoAnne’s Fabrics frequently has 40% off coupons available for non-sale fabrics.  This can be an incredible boon for when you wish to buy costly wool blends, linens, or knit fabrics.  I sign up for their flyers and have used their coupons many times.
  • Locate a discount fabric store: bigger cities often have fabric stores dedicated to “end of run” fashion fabrics, or “end of bolt” fabrics.  These are often at a good price.  Smaller towns lack the industry that makes these stores likely to crop up, however, if you are visiting a big city near you, do a little research and see if you can find one.
  • Buy by the bolt: this is not generally possible to individuals but always ask if there is a whole bolt discount.  A bolt comes with 15 yards, generally.  This is worth buying if you buy something like a heavy cotton twill for making shorts, skirts, pants, or jackets.  You can probably get 5 garments out of a bolt.  One example of an online store that sells fabric to anyone by the bolt for a 40% discount is the Fabric Depot in Portland Oregon.
  • Buy undyed fabric. I know of only one source for this: Dharma Trading in San Rafael California.  The quality varies on their fabrics from decent to excellent.  The catch is that they come only in white/natural (a couple of them come in black) which means you will have to dye them yourself which is a cost, to be sure, and takes more time, but the price of their silks make it worth considering as an option.
  • Buy patterns on sale: most pattern companies such as McCall’s, Vogue, and Simplicity, have periodic sales on their patterns- often for 40% off.  Most of the stores that carry them will have at least one of those three on sale at any given time.  Sometimes you will see patterns on sale for $1.99.
  • Copy patterns from friends: copying patterns from friends is a great way to save money on patterns.  You will need pattern paper to do this well, but it’s worth it.  Do not cut out the pattern size you need, just lay the pattern pieces underneath the dot paper and trace the size you want including all the piece numbers and markings and notches.
  • Thrift stores: you can find good fabric, notions, and patterns at thrift stores but you need to be aware that patterns are often not complete and are already cut out to a specific size.  Sometimes it’s worth taking the chance for the huge cost savings.
  • Save buttons from old clothes: Buttons used to be so costly that no shabby garment would meet its resting place in the hearth until the buttons were removed and saved.  If you find you have to retire a favorite shirt or coat- save the buttons.  You can use them again!  I have (thanks to a favorite online friend and a local antique store) a very nice button collection.  I also buy buttons I like in different sizes when they are on sale.
Using the tips I’ve shared above I can make shirts for myself for as low as $10 a shirt,  but at a higher quality than I can buy from a store.
When it comes to home economics it is important not to find yourself unnecessarily spending $10 just to save yourself $1.  It is easy to get swayed by cheap prices of products and services offered by stores like Walmart.  I once bought a pair of pants at K-Mart for $15 which seemed like a great bargain at the time but when I put them on the next day they ripped within the first two hours of wear!  The fabric they were made of had no tensile strength which means that it was probably made of cheap short fibers.  I didn’t save myself $20 by not spending $45 dollars on a better pair of regularly priced pants, I WASTED $15.  Period.
It is telling, in my opinion, that while cheap clothes from deep discount stores have come and gone through my dresser drawers and closet ruthlessly fast over the years, the clothes that I still have, that are still in perfect wearing condition, are the ones I have made for myself.
Easy Way to Stitch Anarkali Suit

          Easy Way to Stitch Anarkali Suit 


Stitching ideas for Anarkali outfits:

Anarkali outfits are fabulously excellent and amazingly popular among the modish girls. To enhance charming elegance of striking personality, stylish girls like to wear exclusive designs of magnificent Anarkali outfits. These dresses have their prestigious relevance from splendid mughal empire. Here we are sharing stitching ideas for Anarkali outfits.
For those personalities who love top wear Anarkali outfits. These stitching ideas are tremendously beneficial. To enhance charming grace of superb personality these magnificent stitching methods are exactly awesome guideline. Let’s discuss these amazing stitching ideas which are fabulously marvelous for sewing an admiring Anarkali dress.

 Anarkali flare frock cutting:


1 how to stitch anarkali suit in a easy way (3)
For cutting an impressive frill Anarkali frock, this picture in exploring cutting idea for make its stitching easy. From this impressive cutting idea you can have exact shape of frill Anarkali frock which is fabulously marvelous j striking grace. For fashion lover girls this fantastic idea is fabulously marvelous.

Umbrella frock cutting idea:

 
2 how to stitch anarkali suit in a easy way (5)

2 how to stitch anarkali suit in a easy way (5)
For umbrella frock is charmingly excellent frock is terrific. This magnificent frock cutting is done by folding clothe piece. Cut the bottom of clothe piece in round shape. And attach it wit separate patti. Your impressive umbrella frock’s cutting will be done through this way.

Penals’s frock cutting idea:

3 how to stitch anarkali suit in a easy way (1)
For Anarkali frock, relay upon magnificence of penal. Through cutting of penals you can create am impressive Anarkali frock. This excellent Anarkali frock will be elegant and awesome in its stylish grace. Through cutting of penals and their join stitching you will have striking elegance of Anarkali frock.

Excellent cutting ideas for Anarkali outfits:

Some more elegant ideas for cutting of Anarkali suits we are sharing an exclusive gallery. Have an impressive glance of share gallery with appreciating eyes and pick some ideas for Anarkali dress’s stitching. Enjoy the elegance of fantastic gallery.

How to Make a High Low Shirt


The high-low fashion trend is everywhere on runways and in retail stores. The high hem in front and low hem in back is popular on shirts, skirts, dresses and coats. You can easily make a high low shirt from a thrift store purchase, just measure and modify to fit your body

  1. Image titled Make a High Low Shirt Step 1
    1
    Find an old t-shirt or button down shirt in your closet. You can also purchase old shirts at a thrift store if you don’t have any that need to be refashioned. The more worn the fabric is, the better it will work.[1]
  2. Image titled Make a High Low Shirt Step 2
    2
    Choose a shirt that is loose. High-low shirts tend to be drapey and hang loosely over the stomach and hips. They can even be layered over tank tops.
  3. Image titled Make a High Low Shirt Step 3
    3
    Opt for a shirt that has a flap in front and back. Baseball shirts or those with a similar hem are even easier to convert.


  1. Image titled Make a High Low Shirt Step 4
    1
    Try on the shirt. Decide how high you want it to be in front. Draw a dot on the center front of the shirt where you want the front hem to hang with a fabric pen or washable marker.
    • If you are going to hem the shirt, make sure you include a one half to one inch (1.3 to 2.5cm) allowance for the hem.
      Image titled Make a High Low Shirt Step 4Bullet1
    • If you have a high-low shirt that you want to emulate, put the new shirt on over this shirt to ensure a good approximation of its length in front and back.
      Image titled Make a High Low Shirt Step 4Bullet2
    • Some front seams crop around the belly button. More conservative high-low shirts stop fall just below the belt line.
      Image titled Make a High Low Shirt Step 4Bullet3
  2. Image titled Make a High Low Shirt Step 5
    2
    Pinch a point in the back center of the shirt where you want your low hem to fall. Attach a safety pin into the pinched fabric. Take off the shirt and mark the center with your fabric pen.
    • Some back hems on high low shirts drop below the butt, while others float around the middle of the back pockets on your jeans.
      Image titled Make a High Low Shirt Step 5Bullet1
  3. Image titled Make a High Low Shirt Step 6
    3
    Lay the shirt on your craft table. Imagine a line from the center dot to the top of the collar. Fold it along this line and along the center of the back.
    • Smooth it out on your table.
      Image titled Make a High Low Shirt Step 6Bullet1
    • The side seam should now be in the center, between the folds. Straighten it out so the fabric on the left and right sides of the shirt are perfectly mirrored.
      Image titled Make a High Low Shirt Step 6Bullet2
  4. Image titled Make a High Low Shirt Step 7
    4
    Draw a downward arc with your fabric pen from the front dot to the back dot.Although you are only drawing it on a single side, you will cut through both layers of fabric.
    • Ensure you account for seam allowances across the arc if you plan to sew the shirt.
      Image titled Make a High Low Shirt Step 7Bullet1
  5. Image titled Make a High Low Shirt Step 8
    5
    Cut along the arc with very sharp fabric scissors. Take your time to make even, smooth cuts through both layers of fabric.[2]
  6. Image titled Make a High Low Shirt Step 9
    6
    Turn your scissors horizontally on the bottom of the back (low) hem to make a flat edge. Repeat on the front edge to ensure the center of the hems don’t result in a point.
  7. Image titled Make a High Low Shirt Step 10
    7
    Try on your shirt. If you don’t want to hem the shirt, it is finished and ready to wear
  1. Image titled Make a High Low Shirt Step 11
    1
    Turn your shirt inside out if you want to hem it at the bottom.
  2. Image titled Make a High Low Shirt Step 12
    2
    Plug in your iron and set it upright on your ironing board to heat up.
  3. Image titled Make a High Low Shirt Step 13
    3
    Flip the bottom edge of the fabric up approximately one-half inch (1.3cm) and iron it in place. Follow suit along the entire bottom edge of the high-low shirt.
  4. Image titled Make a High Low Shirt Step 14
    4
    Fold it a second time if you want a t-shirt-like hem. It will also protect the cloth from fraying. Pin it in place if it is difficult to iron evenly.
  5. Image titled Make a High Low Shirt Step 15
    5
    Set up your sewing machine. Use a spool of matching thread to disguise the hem.
  6. Image titled Make a High Low Shirt Step 16
    6
    Sew a close stitch along the inside edge of the hem. Use a double needle for a double-folded, t-shirt hem.[3]